
Art
I've always loved to draw, and one day I decided to pursue art a little further by taking lessons.
I learned so much more about the techinques for drawing, and got to better capture
everyday objects through charcoal drawing(which I personally find more fun than graphite drawings). Charcoal drawings are amazing
in learning the basics of lights and shadows.
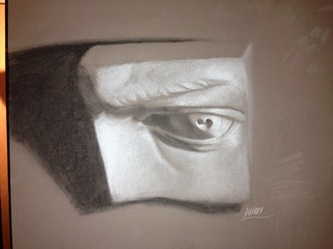
Once I got the hang of it, I moved to Charles Bargue drawings, and replicated them using graphite pencils. These really taught me specifically how to
draw people, and also helped me get much more accurate drawings of my subject. And finally, once all these skills were more or less mastered, I began oil painting, a long and painstaking process, but
usually worth it in the end. All of the images on this page are of my own artwork. Hopefully if you're interested in these works, you can start to make your
own using the information here.
The Basics
Terminology
In any form of art, there are basic words that describe different parts of the artwork.
The three most basic are shade sides, light sides, transitions, and highlights. There are other words for these, but
these are what I will refer to on this page.
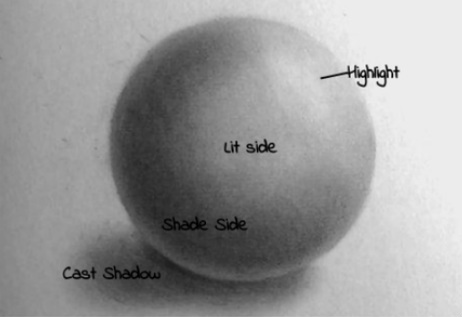
If you look at an object with a distince light source, you will see that it is generally split into
two sides: one hidden in shadows, and the other is lit up from the light. Logically, the respective sides are called the shade and light sides.
These are the easiest ways to divide a subject when you draw it, and work on more details. The transition is not as easy to recognize, but if you look
closely at the area between the two sides, there is a slightly darker line right before becoming the light side. Incorporating the transitions in your drawings make it look
so much more realistic and gives more dimension, even though most people don't notice it in real life. Finally, highlights are the places on the light sides where light is most concentrated.
Basically if there is a very bright spot of light on the object, it is probably a highlight.
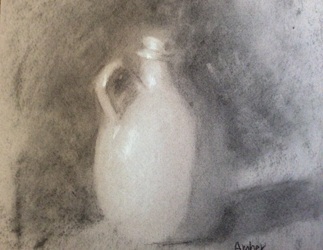
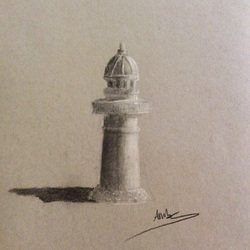
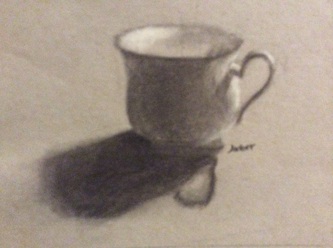
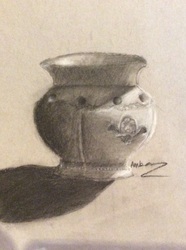
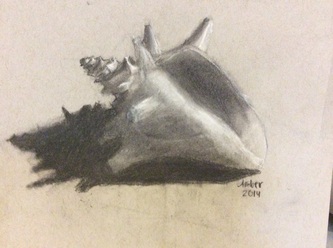
Charcoal Drawings
All of my charcoal drawings below were created using real like objects/models
that I replicated. Usually lighter colored objects work best, as it is easy to
see the light/shade sides, and with a limited color palette (basically just shades of white, black, and grey),
the object can be easily identified.
It is important to have a good light source
shining on the object at an angle, as this makes the light/shade sides more distinct and makes the object more interesting
to look at. (If you need to review the basics of drawing, visit The Basics).
Charcoal Drawing Materials
- Charcoal or pastel paper (any smooth, grey paper can work as well)
- Vine Charcoal: I prefer a thick charcoal, but thin varieties are also nice for finer details
- Charcoal Pencils (2B, 4B, 6B)
- White Charcoal Pencils
- Stump: This is like a paper stick sharpened at both ends
- Kneaded Eraser: This is an eraser that resembles some sort of clay
How to Draw with Charcoal
Make sure you know the basics and terminology of drawing first (If not, visit here).
As most things in art, you want to work your way up to the details.
First, make sure your subject is placed in good lighting
that gives it a distinct light and shade side, and you are eyelevel with it (or at least in the perspective you want).
I like to draw on an easle so I can easily compare my drawing and subject.
Next, using your vine charcoal, sketch a very rough outline
of the subject using thick lines. I usually work on my shade side first, using the vine charcoal to do general shading and then using
dark charcoal pencils for more dimension and details. The stump is especially useful for blending the charcoal. The side of the stump can be used to
blend large areas, and the point is good for blending the highlights. Make sure to only use one side of the stump for the dark areas, and one for the light areas.
The light side can be built upon using the white pencils, and make sure to make striking highlights, as they look really good in charcoal drawings. All in all,
charcoal drawings are very free and unstructured, and don't be afraid to try out new methods.